How often should I refinish my hardwood floors?
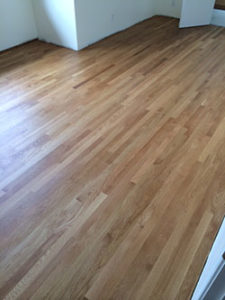
 Whether you live in the Berkeley Hills or Alamo, if you have wood floors they are most likely original to the house. Whether you live in San Pablo or El Cerrito, you most likely have a white or red oak solid floor. These floors are solid wood and had been around for decades, some even more than a century. The life span of a traditional oak floor is longer than what most people think. We just refinished a white oak floor that was installed in 1965. It has been around for about 50 years and has more life on it for another 50. When we refinish oak floors we get this question a lot: “how long before I need to refinish my floors again?”
The short answer is: it depends. Some floors will need to be refinished after several years and some after more than a decade. Here are the factors that contribute to the durability and longevity of the wood floors finish:
- Professionally sanding the floors – a qualified contractor will only sand very little off the floor. Poor sanding can take years off the life of the floors. Also, the smoother and more flat the sanding, the more consistent the finish layer will be
- Using commercial finishes – if your contractor uses cheap or DIY finishes from the local box store, you are guaranteed a finish that will wear and tear quickly
- Following manufacturer recommendation for the proper drying and curing conditions. Home owners are told it is okay to move in two days after the final coat was applied. It is not. The finish needs proper time to harden and cure and that takes more time than two days
- Maintenance – proper care for your wood floors will guarantee more years of use before a need to refinish
From our experience at Avi’s Hardwood Floors the average family would need to refinish their floors every 10-15 years. With proper sanding and finishing on our end, and proper use and maintenance on your end (the consumer) your wood floor finish will last a long time.
 Home services can be cheap or expansive. Some services that come to mind are plumbing, heating, painting, kitchen remodeling and of course wood floors. We all know the saying you get what you pay for. In most cases it is true and I have seen too many floors that failed because of a price point decision made by the consumer. The most common mistake consumers make is hiring flooring contractors based on price or letting the price be the first deciding factor on their list.