Tips for getting the best out of your hardwood flooring contractor
They say it’s the little things in life. Well, it is. Especially when hiring a flooring professional to redo your hardwood floors. Now that you’ve gone through interviewing and finally hiring your flooring contractor, it’s time to let them do the work. Let’s face it, it is pretty awkward when strangers like contractors work inside your home. No matter how qualified and professional they are, it still feels a little like someone is in your private space. We are located in the Bay Area, California so what I write here is from working in my immediate area for more than a decade and a half. We refinish, install and repair hardwood floors mainly in the East Bay but what I write probably applies to many other trades.
- Try to be on time or a few minutes early to your estimate appointment. We usually travel an average of 20-30 minutes to get to your home on time. We don’t want to be late and if we are a few minutes early (especially in the morning) please let us in and not wait outside.
- Contractors have a bad reputation for a lot of reasons. Home owners try to protect themselves by doing due diligence. We always welcome questions and questioning us but don’t compare what we say to what you read on Google search in a manner that implies Google knows better than us. You don’t do it with your doctor or dentist so please don’t do it with us. We are professionals in our trade for a lot of good reasons.
- Be ready when you say you will. It is frustrating to a hardwood flooring contractor showing up to work and the site is not ready. Don’t still be making breakfast in your kitchen while your couch is in the middle of the living room and you need “just a little more time to finish up getting ready”.
- Don’t micro manage your contractor. You will get the least our of a contractor by watching them all the time which leads me to
- Thank you goes a long way. A small snack to the professionals crawling every inch of your floor to make sure it is perfect wouldn’t hurt either. I noticed that when my guys hear a thank you or get some water (me too) it makes the moral on the job much higher.
- Handling a construction remodel can be stressful. By the time you get to the finishing touches like hardwood floors you are probably coming to a close on the planned schedule. Allow your contractor enough time to complete his/her work to the standard expected.
I am sure there are many more dos and don’ts on this list which could go on forever. Remember that making life easier on the people you hire makes life easier on you.


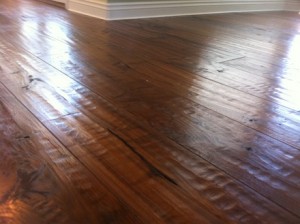
 Hand scraped floors are beautiful and full of interesting elements; peaks and valleys, pronounced color variation, knots, mineral streaks and more. Much like any other wood floor it requires regular cleaning and maintenance. Here are a few things you should do to preserve the beauty of your hand scraped floors:
 They have weird names that are hard to pronounce. They come from countries you didn’t know existed (let’s face it – you didn’t). Everyone hates working with them: you, your nailers, your saw blades, even your finish! Yes, I’m talking about exotic woods. In our trade we are familiar with names like Brazilian Cherry, I’pe, and Padauk which are more readily available. Some woods are so rare and expensive they are sold by weight like Cocobolo (
 Sanding and finishing: here is a dilemma = I should start with a 36 grit because this is a really hard wood but, because it is such a hard wood how in the world am going to take those scratches out? Well, you are right. Better to start with 50 or 60 and change your abrasive frequently instead of starting with 36 or 40. Trying to get scratches out of Ipe’ is like trying to…well…let’s not even go there.